The Collaborative Process Of Making Prints | |
| Collaboration. Making art can be done many ways. In the printmaking world, it is often a very collaborative process. There is a great deal of planning, and a great deal of development that goes into the final product. In the image to the right, you can see artist B. H. Giza (on the left) discussing details of the the printing process with master printer Janet Flohr of Hare and Hound Press. Once a plate has been made, B. H. Giza may print several proofs on his own until he is comfortable with the image, and how it translates from the metal plate to paper. Then he works with Janet and her colleagues to identify how the edition will be completed -- everything from the size of the limited edition, type of paper, plate-wiping techniques, color of ink, etc. The artist and printer will work out these details together through the process of proofing. When the final decision is made, a "bon á tirrér" or "approval" print is made, and the edition is started. As you might imagine, this requires tremendous trust and respect between the two parties. | 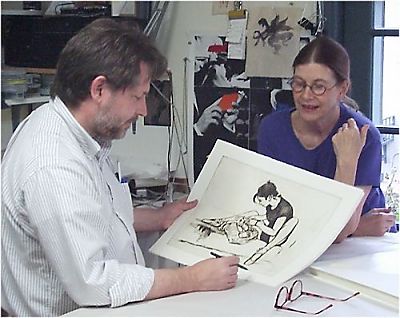 |
| |
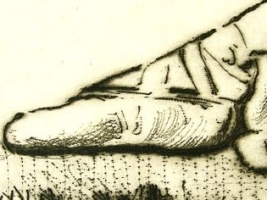
Close-up that shows the burred line in a drypoint print | Many of the prints that you see at BalletArt.Com are drypoint engravings. In this technique, the plate is made by scraping directly into the metal with an engraving tool. This direct work on the plate creates the drypoint's special "burr" quality to the line, generating the warm fuzziness to the edge that is valued by collectors as the mark of a true, hand-made, hand-pulled edition of prints. The editions are smaller (drypoint editions rarely go beyond 50 prints), but the artist can draw directly on the plate, and can also avoid the poisonous fumes associated with acid etching.
|
| |
| |
The Step-by-Step Process of Creating a Print |
| |
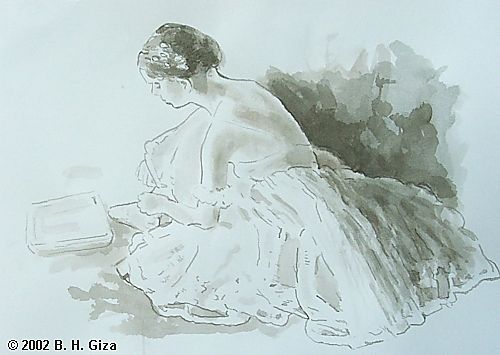 | The brush and ink sketch seen to the left is part of a series of studies that B. H. Giza made for the "Cinderella Backstage" print. A number of these sketches are produced to work out the position of subjects, lighting and compositional aspects, and to develop the "look and feel" of a piece. You might notice, for example, that the resin box to the left of the dancer has been removed in subsequent images. This was done for compositional purposes, as the image was developed in a vertical aspect, eventually emphasizing the interplay of ovals, triangles, and curved lines.
|
| |
| |
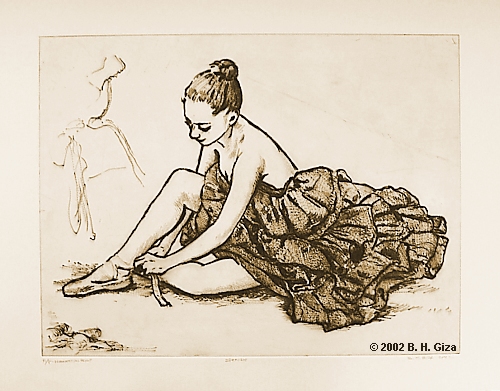
| The drawing to the right was produced at the same size as the plate (18 by 24 inches) to work out compositional and figure-placement issues for the "Cinderella Backstage" print. The artist worked with ballpoint pens, creating dense cross-hatched layers to build up the feel of a shadowy, chiaroscuro backstage environment. Note the changes between the brush sketch of the foreground figure (shown above), and also in the re-arrangement of the figures in the print-proof (shown below). | 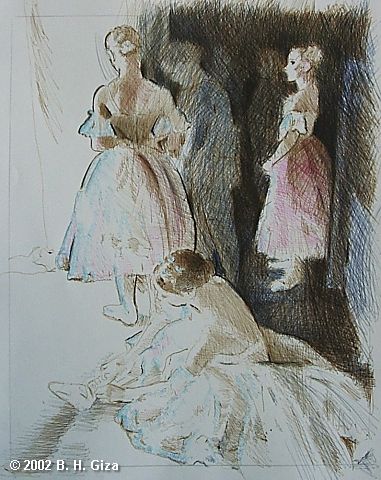 |
| |
| |
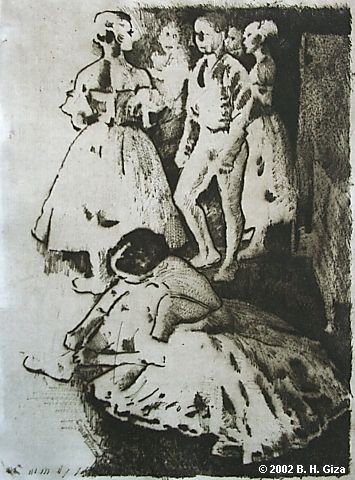 | After the artist is satisfied with the basic compositional issues, a quick sketch is made on the metal plate (in this case, an 18 by 24 inch zinc plate). A light sketch is made in permanent felt-tip pen (which actually is easily removed with alcohol). The image is cut into the plate with engraving tools (B. H. Giza uses Dremel diamond-tipped power engravers, and touches up details with dental tools). Periodically, a proof is printed. This "stage-proof" provides the artist with feedback on how the image is developing. Stage proofs are "in-progress" steps, and they are often destroyed after the edition has been finalized. You may note that while the thrust of the composition is similar, the background figures have been assembled differently from the ballpoint pen sketch shown above. Many more changes have already taken place for this plate, now close to completion. |
| |
| |
Here is the latest new print, an edition of 26 drypoint images titled "Spanish" |
| |
| |
Link to the February - March 2002 Work in Progress Page
|